Lessons learned
May 4, 2021
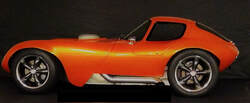
My Cheetah tribute has been driven about 300 miles since I "completed" it about two months ago As most folks with custom cars know, they are never really complete. There is always something else you want or need to do. But I've learned a few lessons I'd like to share for the benefit of others who might stumble across this site.
The optimum way to do a complete car build or restoration would be to do all the mechanical work, assemble the car and drive it for a bit before disassembling it for painting. That leaves only the interior finish work to be done after the car is assembled the last time. Unfortunately, that was not an option for me for two reasons. First, the state office that would issue a title for this car would not inspect it until it was complete, including paint. That meant it couldn't be driven on public streets until if was complete. And second, I was racing against my own advancing age to complete the car while I was still healthy enough to get in and out of it. For these reasons I was forced to wait until the painted car was completely assembled to drive it and discover some issues.
One issue that revealed itself when the suspension started moving on the road was body parts rubbing against the tires. I was able to reshape the fiberglass parts that rubbed with minimum effort, and the result is not readily visible to most. But it would have been better had that been done before painting.
Another matter that took lots of road testing to resolve was the muffling in the side pipes. Using a phone app sound meter I determined that the unmuffled exhaust registered about 85 db taken about eight feet away with the engine at idle. Nine designs later I settled on an insert that lowered the sound to about 73 db at idle. The sound level while driving at 65 MPH is quite loud but tolerable. It seems very much like the Cobra I used to have. The insert is 19" long and fits inside the 4" diameter sidepipes.
A system that surprised me with several issues was brakes. The calipers are from a 1990 Corvette and are more than enough for such a light car. The floor mounted pedal assembly is the 600 series from Titlton with type 74 master cylinders and a balance bar. Based on the research I did four years ago I purchased 3/4" diameter master cylinders and added residual pressure valves to compensate for the calipers being higher than the master cylinders. I also plumbed an AC Delco U855 pressure activated brake light switch into the system.
I went easy on the brakes for the first 200 miles partly to allow the pads time to bed in, and because I tend to use engine braking for normal stops. But the brakes felt a little weak in stopping power so I found a place to try an emergency stop. I discovered that I could not lock up any of the tires while I had a very firm pedal. I also discovered that the brake lights were not illuminating. After discussing the problem with a Tilton technician, I discovered that the master cylinder for the front brakes should have been 5/8" diameter rather than 3/4". While that may not sound like much, the larger master cylinder increased the pedal pressure required for effective braking by about 40%. After installing the smaller diameter master cylinder and fine tuning the balance bar, I can lock the front brakes before the rear as is recommended.
The failed brake light turned out to be a bit more challenging due largely to the lack of information provided by manufacturers of the pressure switches. I'll spare you the chronology and jump to the conclusions regarding failure of the AC Delco U855. Three of these switches failed in the first 600 miles of use! All three began to leak and then failed in either the always off or always on position. I assume it is intended for use on a car with power brakes where the pressure applied to the switch is considerably lower than that going to the wheels. In any case, I removed the hydraulic pressure switch and plugged that hole in the brake line. I then installed a mechanical lever operated switch behind the brake pedal. The switch is spring loaded to the ON position and switches to OFF when the lever is pulled forward. The switch is connected to the back of the brake pedal with a cable that pulls the lever to the OFF position when the pedal in the rest position. When the pedal is pressed, the cable relaxes allowing the lever to pull back to the ON position and illuminate the brake lights.
The final brake issue was the parking brake. I could not pull the tunnel mounted handle hard enough or far enough to engage the parking brakes on the rear calipers. After troubleshooting the system I discovered I had mounted incorrect return springs at the calipers. These springs resist pulling of the brake cables and assure the calipers are not engaged when the parking brake handle is free. The springs I mounted were so strong I could not overcome them to actually move the parking brake levers on the calipers. I found and mounted some lighter weight springs of the same length and the problem was solved. Barring anything new popping up, the brake systems seems good now.
Another lesson learned after the car was on the road regarded the fuel gauge system. The tank was custom built to my design with a typical float style fuel level sender. The gauge can be programmed for a variety of ohm inputs to match the sender. The challenge is that the cross section of the 16 gallon tank is shaped like an inverted triangle - wide at the top and narrow at the bottom. So when the sender float is halfway down, there is actually only about a quarter tank of gas left. As the gauge is programmable, I programmed it to read Empty when there are two gallons in the tank, and Full when it is full. That results in the gauge reading reasonably close for the top 14 gallons with a two gallon reserve. Knowing what I know now, if I were to do it again I would use a capacitance style sending unit whose signal is based on the actual volume of fuel rather than depth.
May 31, 2021
I was having trouble charging the air conditioning system with refrigerant due to high pressures and started researching possible causes. One possible issue was insufficient cooling by the condenser. So I rechecked the pusher electric fan I had mounted in front of the condenser. It was advertised as "reversible" to be either a pusher or puller by reversing the polarity of the power connections, and it did in fact blow either direction. But I discovered that due to the shape of the curved fan blades, it worked far better as a puller than a pusher. I tried to disassemble the fan to reverse the blades, but that was not possible. So I have ordered a new fan that is intended to work as a pusher. .... The lesson here for others is that some sellers advertise their puller fans as reversible so they can attract more customers. But if the blades have the curved scimitar shape, be aware that they work poorly in one direction.
June 13, 2021
Note: All the following diagnosis regarding heat proved to be wrong. The correct diagnosis is at the end of this section.
As the weather has gotten warmer, I’ve discovered another problem to be solved. It became apparent when the engine began to run badly while cruising at highway speed on a country road. Simultaneously the air/fuel ratio gauge showed a very rich condition. I nursed the car home and, following a few missed guesses about the cause, decided it was likely the result of fuel in the carburetor float bowls boiling over due to high temperatures under the hood.
I made some changes before taking the Cheetah for an extended test drive. I had good news and bad news. During the test it was hotter than either of the two previous times I experienced the rich condition, badly running engine. I had lowered the float bowl levels, installed a phenolic spacer beneath the carburetor and added what I believe is lower ethanol fuel. I drove the car at highway speed for fifteen miles with no sign of low AFR or rough running. So I turned on the air conditioner to increase the heat load and ran another six miles. Other than the coolant temperature rising about ten degrees F, all seemed well. When I returned home and let the car idle for a couple minutes, it stalled and died. But it started right back up.
Here are my conclusions. My original symptoms were the result of under hood heat causing fuel in the float bowls to boil over while driving at highway speeds. The modifications I made seem to have addressed that condition, but I doubt they will be sufficient in city traffic on a hot day. So I have more work to do.
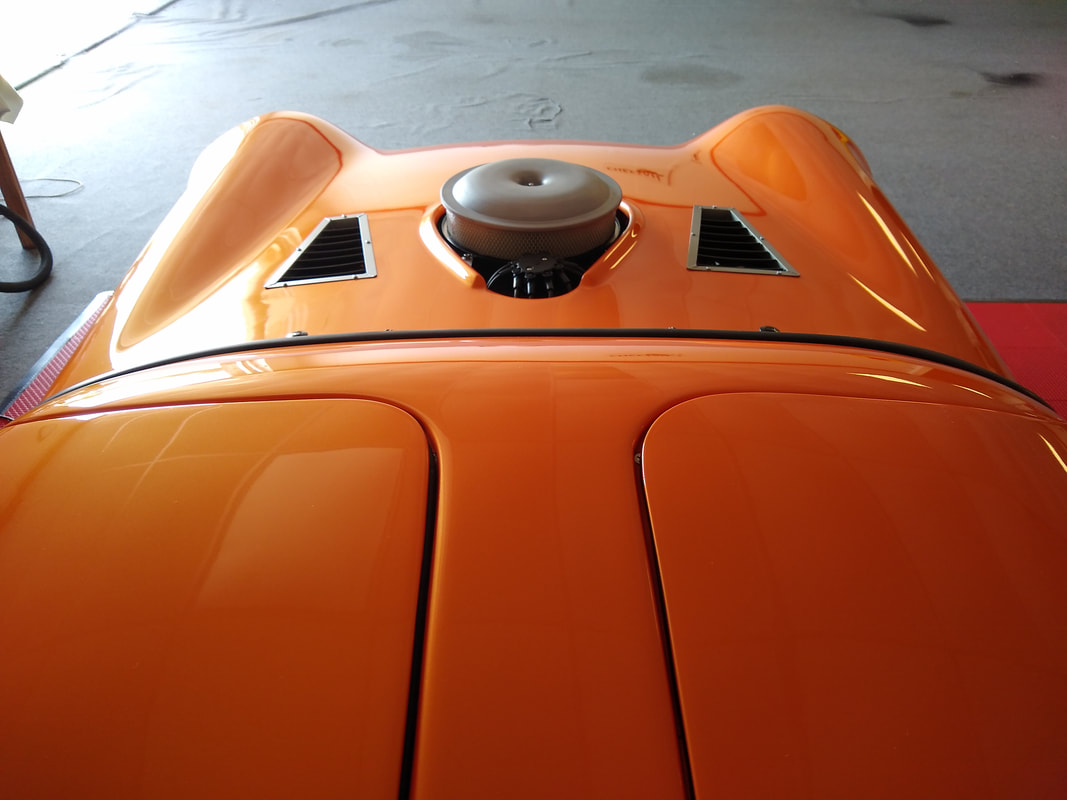
While researching my problem I recalled seeing many of the original Cheetah cars with many holes in the nose. It may be that they were addressing coolant issues, but they may have been addressing fuel issues as well. When I examined the space between the engine and nose of my car, I noticed that there was no easy way for heat from the headers to move away from the engine. As a result, the carburetor is exposed both to conduction heat from the intake and radiant and convection heat from the headers. I believe I will need to do like owners of earlier Cheetah’s did and open some holes above the headers to help evacuate more of the heat.
June 27, 2021
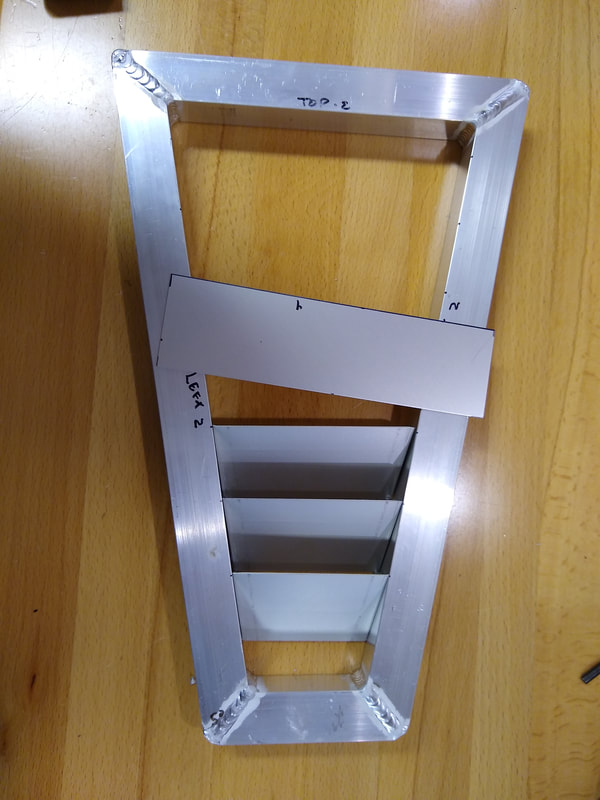
After some research and a few discarded ideas I decided to fabricate and install two louvered vents in the nose above the headers on either side of the air cleaner hole. I couldn't find a ready-made vent in the shape I wanted so I made my own. Each vent consists of a frame made from 1" x 1" x 1/16" aluminum angle, and louvers made from aluminum sheets cut, bent to shape and riveted to the frame. Here are pictures of the vent being assembled, the nose undergoing surgery and the finished project. An early test run showed the vents are moving a large amount of very hot air.
I went easy on the brakes for the first 200 miles partly to allow the pads time to bed in, and because I tend to use engine braking for normal stops. But the brakes felt a little weak in stopping power so I found a place to try an emergency stop. I discovered that I could not lock up any of the tires while I had a very firm pedal. I also discovered that the brake lights were not illuminating. After discussing the problem with a Tilton technician, I discovered that the master cylinder for the front brakes should have been 5/8" diameter rather than 3/4". While that may not sound like much, the larger master cylinder increased the pedal pressure required for effective braking by about 40%. After installing the smaller diameter master cylinder and fine tuning the balance bar, I can lock the front brakes before the rear as is recommended.
The failed brake light turned out to be a bit more challenging due largely to the lack of information provided by manufacturers of the pressure switches. I'll spare you the chronology and jump to the conclusions regarding failure of the AC Delco U855. Three of these switches failed in the first 600 miles of use! All three began to leak and then failed in either the always off or always on position. I assume it is intended for use on a car with power brakes where the pressure applied to the switch is considerably lower than that going to the wheels. In any case, I removed the hydraulic pressure switch and plugged that hole in the brake line. I then installed a mechanical lever operated switch behind the brake pedal. The switch is spring loaded to the ON position and switches to OFF when the lever is pulled forward. The switch is connected to the back of the brake pedal with a cable that pulls the lever to the OFF position when the pedal in the rest position. When the pedal is pressed, the cable relaxes allowing the lever to pull back to the ON position and illuminate the brake lights.
The final brake issue was the parking brake. I could not pull the tunnel mounted handle hard enough or far enough to engage the parking brakes on the rear calipers. After troubleshooting the system I discovered I had mounted incorrect return springs at the calipers. These springs resist pulling of the brake cables and assure the calipers are not engaged when the parking brake handle is free. The springs I mounted were so strong I could not overcome them to actually move the parking brake levers on the calipers. I found and mounted some lighter weight springs of the same length and the problem was solved. Barring anything new popping up, the brake systems seems good now.
Another lesson learned after the car was on the road regarded the fuel gauge system. The tank was custom built to my design with a typical float style fuel level sender. The gauge can be programmed for a variety of ohm inputs to match the sender. The challenge is that the cross section of the 16 gallon tank is shaped like an inverted triangle - wide at the top and narrow at the bottom. So when the sender float is halfway down, there is actually only about a quarter tank of gas left. As the gauge is programmable, I programmed it to read Empty when there are two gallons in the tank, and Full when it is full. That results in the gauge reading reasonably close for the top 14 gallons with a two gallon reserve. Knowing what I know now, if I were to do it again I would use a capacitance style sending unit whose signal is based on the actual volume of fuel rather than depth.
May 31, 2021
I was having trouble charging the air conditioning system with refrigerant due to high pressures and started researching possible causes. One possible issue was insufficient cooling by the condenser. So I rechecked the pusher electric fan I had mounted in front of the condenser. It was advertised as "reversible" to be either a pusher or puller by reversing the polarity of the power connections, and it did in fact blow either direction. But I discovered that due to the shape of the curved fan blades, it worked far better as a puller than a pusher. I tried to disassemble the fan to reverse the blades, but that was not possible. So I have ordered a new fan that is intended to work as a pusher. .... The lesson here for others is that some sellers advertise their puller fans as reversible so they can attract more customers. But if the blades have the curved scimitar shape, be aware that they work poorly in one direction.
June 13, 2021
Note: All the following diagnosis regarding heat proved to be wrong. The correct diagnosis is at the end of this section.
As the weather has gotten warmer, I’ve discovered another problem to be solved. It became apparent when the engine began to run badly while cruising at highway speed on a country road. Simultaneously the air/fuel ratio gauge showed a very rich condition. I nursed the car home and, following a few missed guesses about the cause, decided it was likely the result of fuel in the carburetor float bowls boiling over due to high temperatures under the hood.
I made some changes before taking the Cheetah for an extended test drive. I had good news and bad news. During the test it was hotter than either of the two previous times I experienced the rich condition, badly running engine. I had lowered the float bowl levels, installed a phenolic spacer beneath the carburetor and added what I believe is lower ethanol fuel. I drove the car at highway speed for fifteen miles with no sign of low AFR or rough running. So I turned on the air conditioner to increase the heat load and ran another six miles. Other than the coolant temperature rising about ten degrees F, all seemed well. When I returned home and let the car idle for a couple minutes, it stalled and died. But it started right back up.
Here are my conclusions. My original symptoms were the result of under hood heat causing fuel in the float bowls to boil over while driving at highway speeds. The modifications I made seem to have addressed that condition, but I doubt they will be sufficient in city traffic on a hot day. So I have more work to do.
While researching my problem I recalled seeing many of the original Cheetah cars with many holes in the nose. It may be that they were addressing coolant issues, but they may have been addressing fuel issues as well. When I examined the space between the engine and nose of my car, I noticed that there was no easy way for heat from the headers to move away from the engine. As a result, the carburetor is exposed both to conduction heat from the intake and radiant and convection heat from the headers. I believe I will need to do like owners of earlier Cheetah’s did and open some holes above the headers to help evacuate more of the heat.
June 27, 2021
After some research and a few discarded ideas I decided to fabricate and install two louvered vents in the nose above the headers on either side of the air cleaner hole. I couldn't find a ready-made vent in the shape I wanted so I made my own. Each vent consists of a frame made from 1" x 1" x 1/16" aluminum angle, and louvers made from aluminum sheets cut, bent to shape and riveted to the frame. Here are pictures of the vent being assembled, the nose undergoing surgery and the finished project. An early test run showed the vents are moving a large amount of very hot air.
July 9, 2021
The nose vents proved useful but did not entirely solve the problem of fuel boiling in the secondary float bowl. The problem was eventually solved by a combination of nose vents, a phenolic spacer below the carburetor and an aluminum shield mounted above the spacer and below the carburetor. The aluminum heat shield extends out beyond both float bowls to deflect radiant heat from the engine. If I were to plan another engine build for this car I would strongly consider a fuel injection system just to deal with the fuel heating problem.
Note: The actual cause of the engine running rich turned out to be a failure in the new fuel pump that caused an intermittent over pressure at the carburetor. The two lessons here are to include a fuel pressure gauge in the build, and not depend on new, name brand parts to work right out of the box.
July 22, 2021
As soon as I was comfortable driving the Cheetah at highway speeds I noticed a significant steering wheel shake between 55 and 70 MPH. That is the classic symptom of an unbalanced front tire, so I took the balanced front wheels to a different shop to be balanced again using the more advanced "Road Force" balancer. It made no difference, so I began looking for clues about the tires on the Internet.
Tires were one of the first decisions I had to make in building the car. I decided to follow the lead of Stacey David (Gearz TV show) as I figured he had far more experience building cars than me. He (we) used Mickey Thompson Sportsman S/R tires to have that old school fat tire look rather than the modern rubber band style. The fronts were LT 28X10R18 and the rears LT28X12R18. These are big tires intended for vehicles at least twice as heavy as the Cheetah.
My research found several instances of people having trouble balancing this line of tires. As I could find no other cause for steering wheel shake in a car with all new suspension components, I decided to try a new set of front tires. I wanted tires about the same size as before but from a more mainstream, reliable manufacturer. I went with BFGOODRICH G-FORCE COMP-2 A/S PLUS SL in size 255/45ZR-18. When the tires arrived, I removed the front wheels and prepared to deliver them to a local tire store for mounting. I decided to remove the old balancing weights myself so the worker would not damage the wheels. I removed almost two pounds of weights from the two wheels! When the new tires were mounted, they required about two ounces of weights. The new tires look very much like the originals and the tire shake is gone. I hope (and suspect) that Stacey David got his MT tires for free.
August 21, 2021
Four consecutive outings without finding any new problems lulled me into thinking I had passed the "new car failures" phase, but I was wrong. During my last trip I saw hints of transmission fluid and by the time I got home there was at least a cup of it all under the car. After cleaning up a bit, examining the apparent source and doing some online research, I zeroed in on the cause. The rubber boot on the shifter of my T56 Magnum transmission was cut. It was immediately obvious that the boot had rubbed against the sharp edge of the steel sheet transmission tunnel opening.
The root cause of the problem was my lack of understanding of the purpose of the rubber boot. I incorrectly assumed it was there to keep dirt and debris from falling into the shifter mechanism. While it does serve that purpose, it also prevents transmission fluid, that circulates around the shifter pieces, from splashing up and out. Because I did not understand this, I was not concerned about placing the boot too close to the tunnel. I'll remember this if I live long enough to do a project like this again because I'll be pulling the transmission (and engine) to get room to enlarge the hole in the tunnel. (Edit added later: Apparently leaking shifters on T56 Magnum transmissions are common and the causes of mine were more than I suspected at the time. See later posts for more info.)
October 20, 2021
Faced with the need to pull the engine to address the transmission boot problem, I decided to take on two additional issues. One is the oil leak that was not fixed by my last attempt when I replaced the rear main seal and the oil pan gasket. The other is a drivability issue arising from the single plane intake manifold used by the original engine builder.
It is apparent the engine builder wanted as large a peak horsepower number as possible to better promote his (undeserved) prowess in building engines. The tradeoff for the 600 peak horsepower number was an engine with reduced torque and throttle response at the speeds commonly used on the street. To address this I decided to swap for a dual plane Edelbrock 2701 intake.
Given my limited knowledge with engines and my lack of success in my first crack at the oil leak, I decided to farm out all these jobs to a highly regarded local mechanic who specializes in race car engines. I dropped the engine and parts off at his shop yesterday and enjoyed a long, rambling conversation with him. He was asked to do all the work and run and tune the engine before I get it back, hopefully within a few weeks.
December 8, 2021
When it comes to business arrangements, I can tolerate a business that is slow if it doesn't promise something better at the outset. The mechanic I chose for my engine work never promised to meet any deadlines and was candid about being stressed for time by other obligations. As I was too busy with family matters to work on the engine myself for six weeks, I decided to see what he could do. Six weeks later he openly acknowledged he had done nothing on my engine. When he resisted my efforts to establish a date certain for the work to be completed, I told him I'd pick up the engine and do it myself. He asked me to come by the next morning and wear clothing suitable for work.
When I arrived at his shop the engine was right where I had left it, but the mechanic had a plan. He asked what most concerned me about doing the work myself. I answered that I dreaded removing sealant from aluminum heads without scratching them, and I was uncertain that I could determine and fix the cause of the oil leak. So he spent the day showing me how he did it. We began by removing and replacing the intake manifold. It was easier than I anticipated largely because I had done a much better job installing it than the original engine builder when I had to fix an oil leak earlier in the year. We then rolled the engine over to analyze the oil leak at the back. He showed me why he believed the leak was coming from the oil pan rather than the rear main seal. I agreed and he showed me how he used sealant to assure a better seal. With the two most challenging parts of the work done, we loaded the engine on to my truck, I paid him for his time (and my education), and I took the engine home.
Having learned my lesson the hard way earlier, I mounted the engine on my engine run stand and checked it for leaks. It passed the leak test so I started prepping it for installation.
One unexpected issue had appeared while the mechanic and I were working on the engine. He pointed out that the flywheel showed signs of high heat due to a slipping clutch. He immediately assumed I had been doing some hard launches. I know that was not the case, but I did have an idea of what had happened. The first clue was during the first few miles I drove the car. I remembered a sensation like a slipping clutch twice but could not rule out tire spin. It never happened again so I assumed all was well. Seeing the flywheel I knew that was not the case.
I believe the root cause of the problem was my experience with a previous hotrod with a hydraulic throw out bearing (HTOB). It leaked due to over extension caused by a clutch pedal with no stop adjustment. I pulled that transmission at least three times trying to figure out what was happening and it left me hyper concerned about over extension of the HTOB. So when I installed the Tilton HTOB in the Cheetah I fudged the installation to put the HTOB as close to the clutch fingers as possible. My thinking was that the clutch would fully disengage long before the HTOB could extend far enough to leak. But in my zeal, I placed the HTOB where it actually touched the fingers and partially disengaged the clutch even when the pedal was not depressed. I believe that is what overheated the flywheel. I'm hoping a resurfaced flywheel and properly positioned HTOB will solve that problem.
February 12, 2022
With leaks sealed and the HTOB properly adjusted, I put the drivetrain back into the car. It was too cold out to drive the car so I took my time, finishing up in early February. When it warmed up a bit I washed it and made plans to take it to the first cruise-in of the year.
February 16, 2022
:-( The leak at the transmission shifter was not fixed. This time it appears that the replacement rubber boot failed to seal well around the shifter shaft and transmission fluid again flowed out and everywhere beneath the car. Frustrated that the problem was still unsolved and might require the drivetrain to come out again I searched for another solution. I found one that is both expensive and difficult to do, so it must be right. It involves buying an expensive aftermarket shifter that seals in the transmission fluid without the need for a rubber boot. The difficult part is that I will need to cut a larger hole in the transmission tunnel so it can be installed without removing the drivetrain. When the work is done I'll have to fabricate and install an access panel to cover the large hole. Of course this work will need to be done without throwing cutting debris all over the interior of the car. I'll report back when the work is done and tested.
March 28, 2022
Installing the new shifter without removing the transmission was challenging, but not as bad as I imagined. The tool that saved the day was a vibrating multitool equipped with a bi-metal cutting blade. It allowed me to cut a larger hole in the transmission tunnel without spraying debris all over the interior of the car. When all was done and a new piece of carpet was placed on the tunnel, it looked like new. Two hundred miles later there is no sign of a leak.
When the recent engine work was finished I decided to try another change. The distributor is equipped with a vacuum advance that I had not previously connected. I decided to try it out to see if would help with cruise fuel consumption and reduced engine temperatures. After reading up on how to set the timing I discovered a fundamental problem related to the racing components used in the engine build. The engine barely reaches 10" Hg vacuum at idle. Most engines are almost double that. Even with the vacuum cannister adjusted to its lowest setting, it tended to advance the timing even at idle. This is likely caused by the camshaft design. The result is that the engine tended to idle above 1100 RPM and it stumbled when launching at low RPM. Disconnecting the vacuum advance and using straight mechanical advance of 10 degrees BTDC at idle and 34 degree above 2500 RPM worked much better.
